Articles in this section
How To Set Up A Multiplayer Game

Multiplayer is one of the most popular and effective ways to leverage Minecraft in the classroom. It's a great way to encourage collaboration, communication and problem solving as students work together on projects in a shared Minecraft world.
About
Minecraft: Education Edition features multiplayer games that connect using picture based join codes. All players in the same Office 365 tenant can host and join worlds together in the classroom. For most users, this means the part of your email address after the @ symbol matches that of the other players. A single multiplayer game can host a maximum of 40 players, and can connect players across all supported platforms. Server-style multiplayer or a dedicated server is not possible at this time.
Although the Multiplayer experience was designed and optimized for classroom use where all players are on the same network, Multiplayer across different internet connections is possible by making some changes to your home network configuration. Visit the How to Set Up a Multiplayer Game from Home Guide to understand how to host a game that players on other networks will be able to join.
Our support team is limited in our ability to troubleshoot unique network issues, but we are always happy to try to help.
Requirements
Here are the requirements for the best possible multiplayer experience:
- Multiplayer is possible for players within the same Office 365 tenant.
- Players should have the most up-to-date version of Minecraft: Education Edition
- All players need to be running the same version of Minecraft: Education Edition to be able to host and join worlds together.
- Server-style multiplayer is not possible and a sever license is not available.
If you have trouble connecting to a Multiplayer world, check out the Troubleshooting section of this article for tips on how to resolve common issues.
How to Host a World
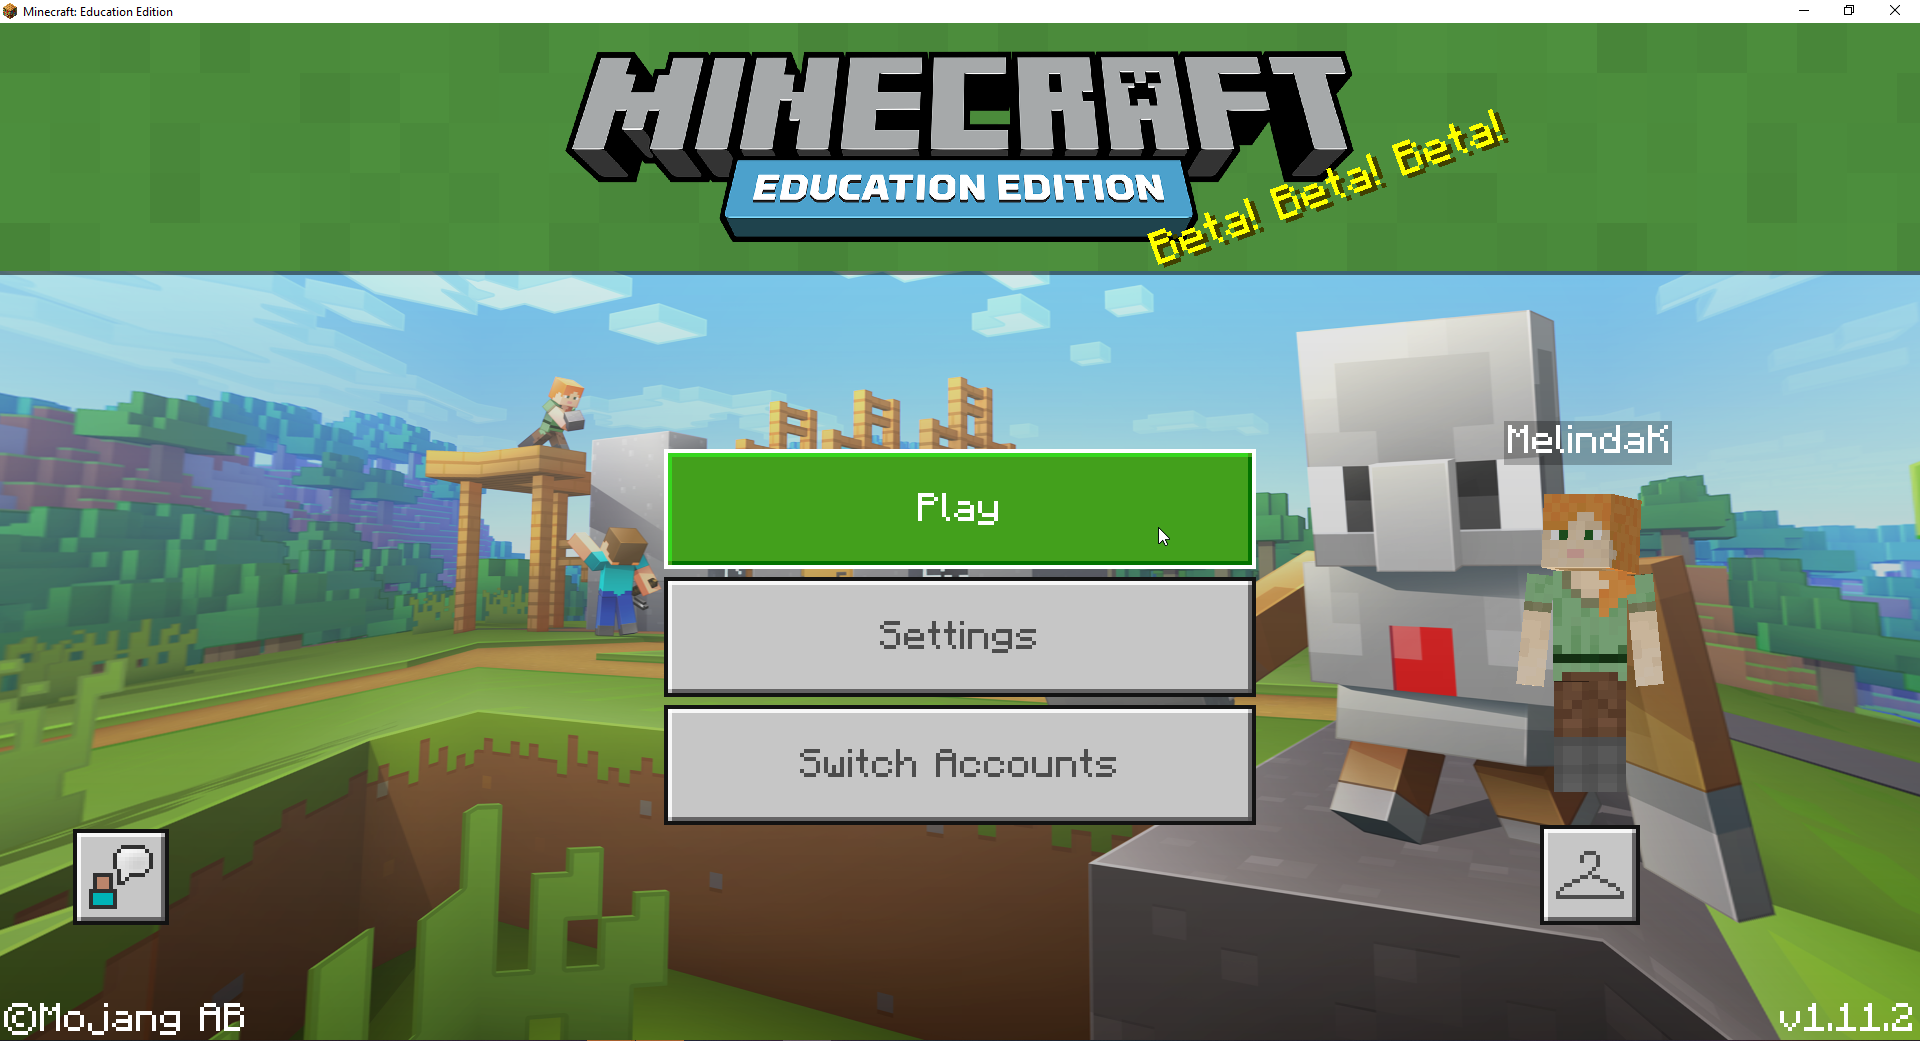
Click Play on the home screen
Host an existing world
Choose an existing world to host from the View My Worlds collection. You can also import and launch a new world from the Library Collection. Follow the instructions in the How to host a world in-progress section to host a world that you open from the Library Collection.
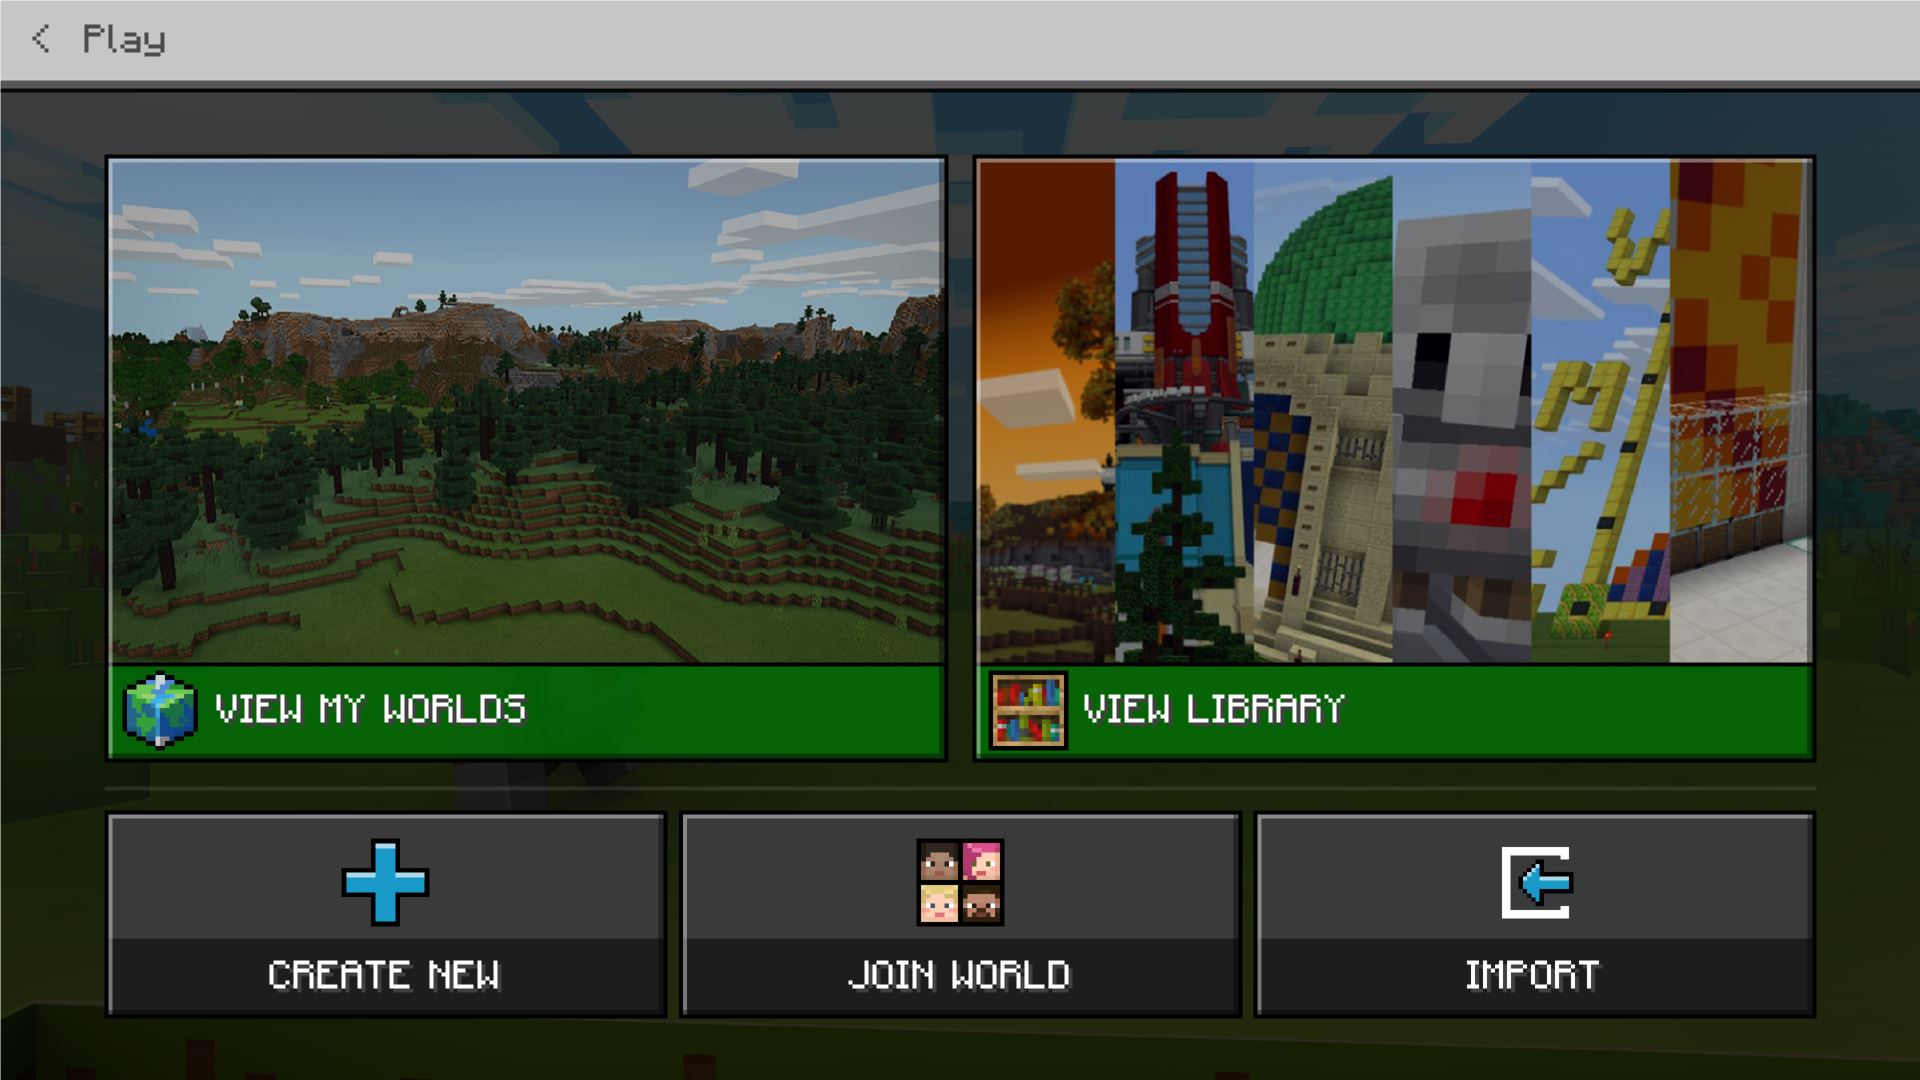
Click on a world in your My Worlds collection and then click Host.
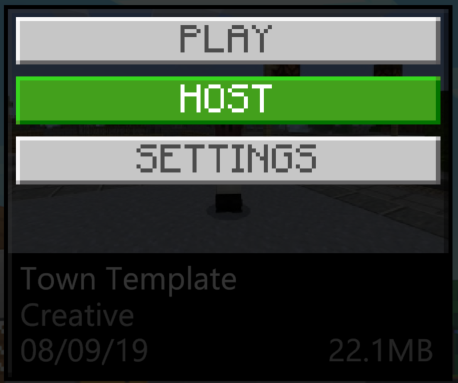
Read the Configure settings for your Multiplayer game section to learn how to access your Join Code and change settings for your hosted world.
Create a new world to host
On the Play screen, click Create New and then click New.
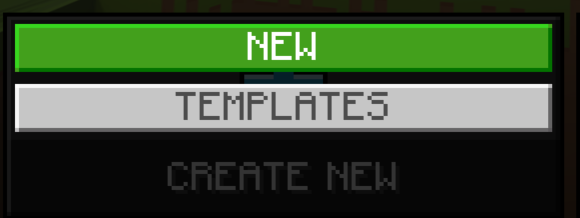
Select the options you would like applied to your new world, and then click Host.
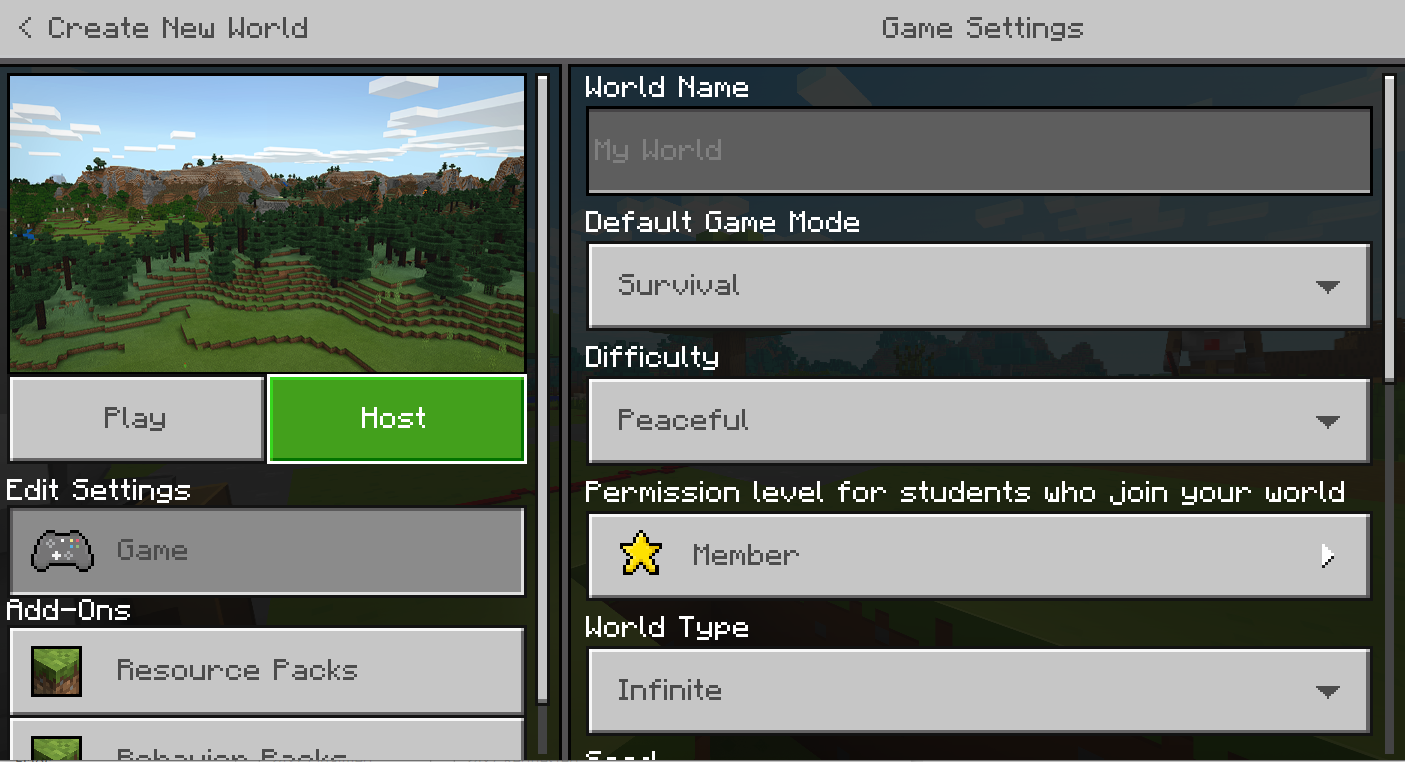
Read the Configure settings for your Multiplayer game section to learn how to access your Join Code and change settings for your hosted world.
How to host a game in-progress
Pause the game and from the Friends tab click Start Hosting then click Confirm.
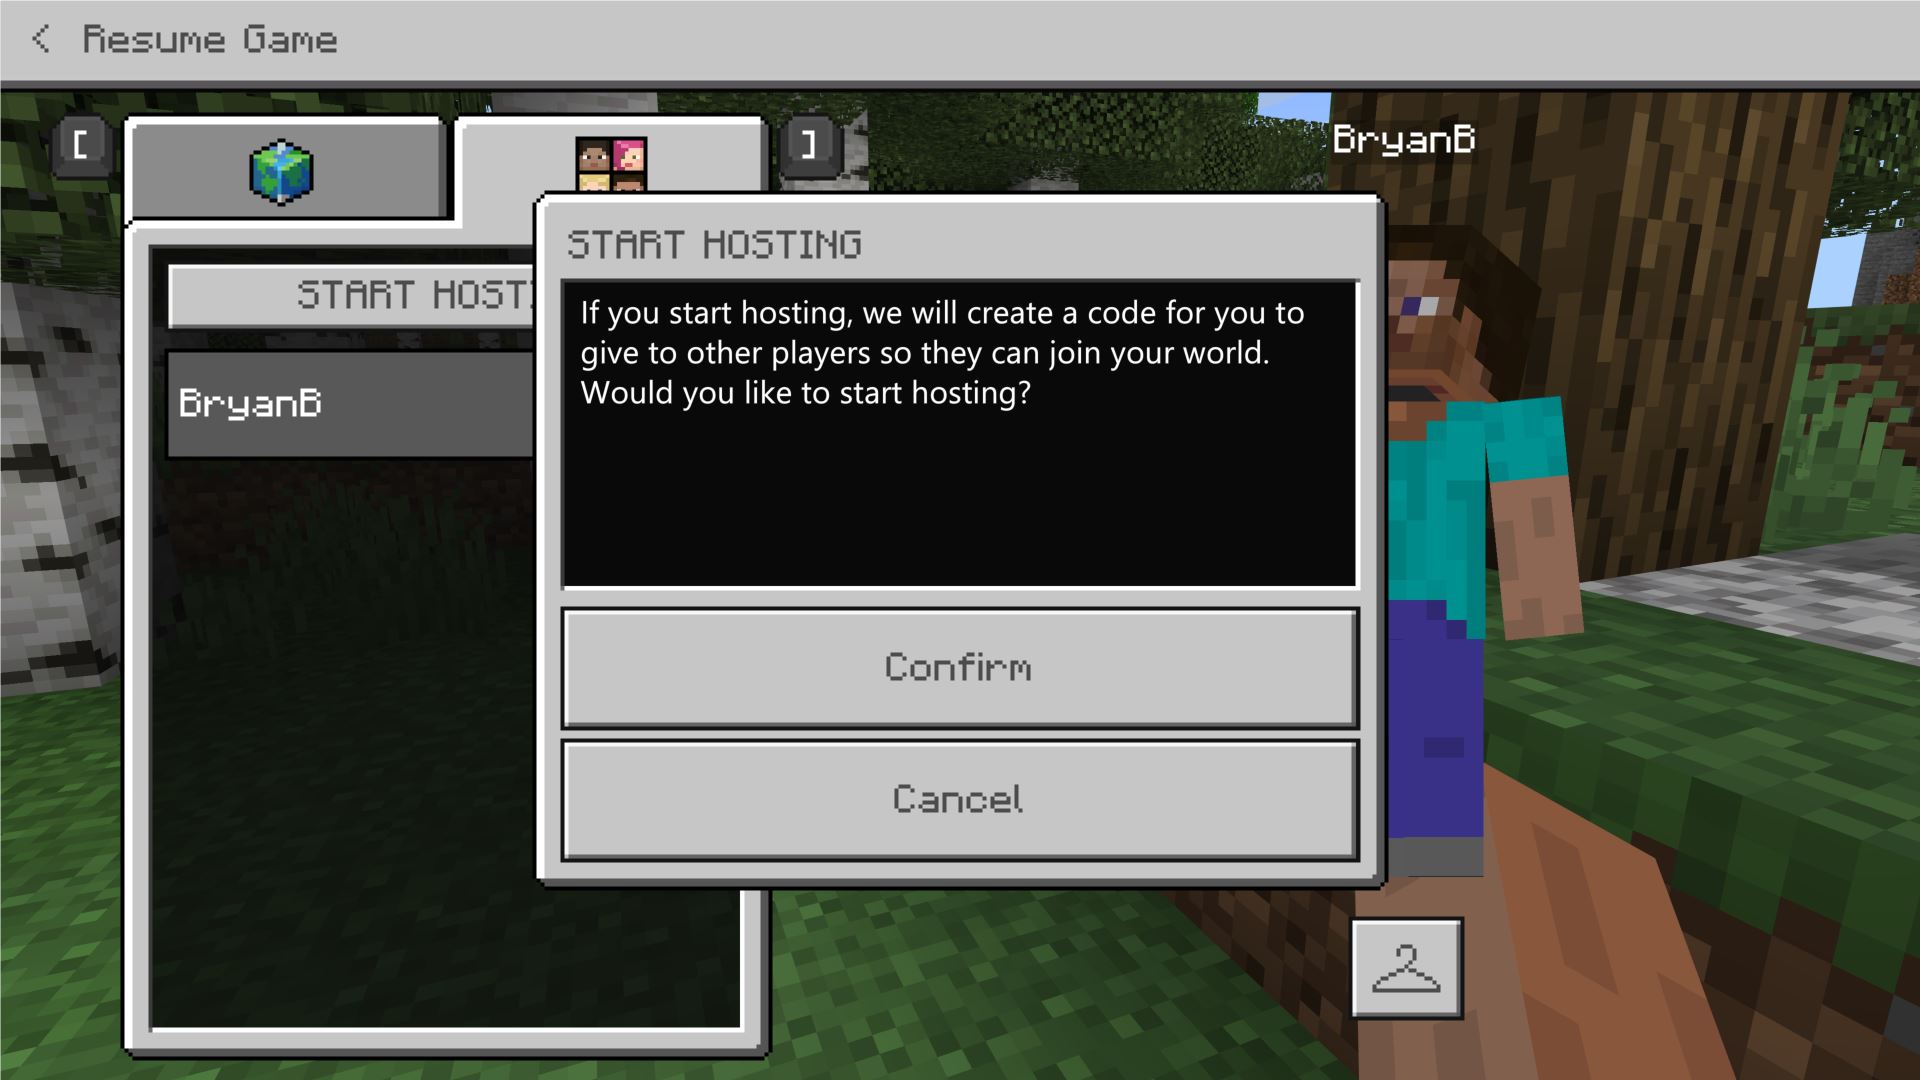
Read the Configure settings for your Multiplayer game section to learn how to access your Join Code and change settings for your hosted world.
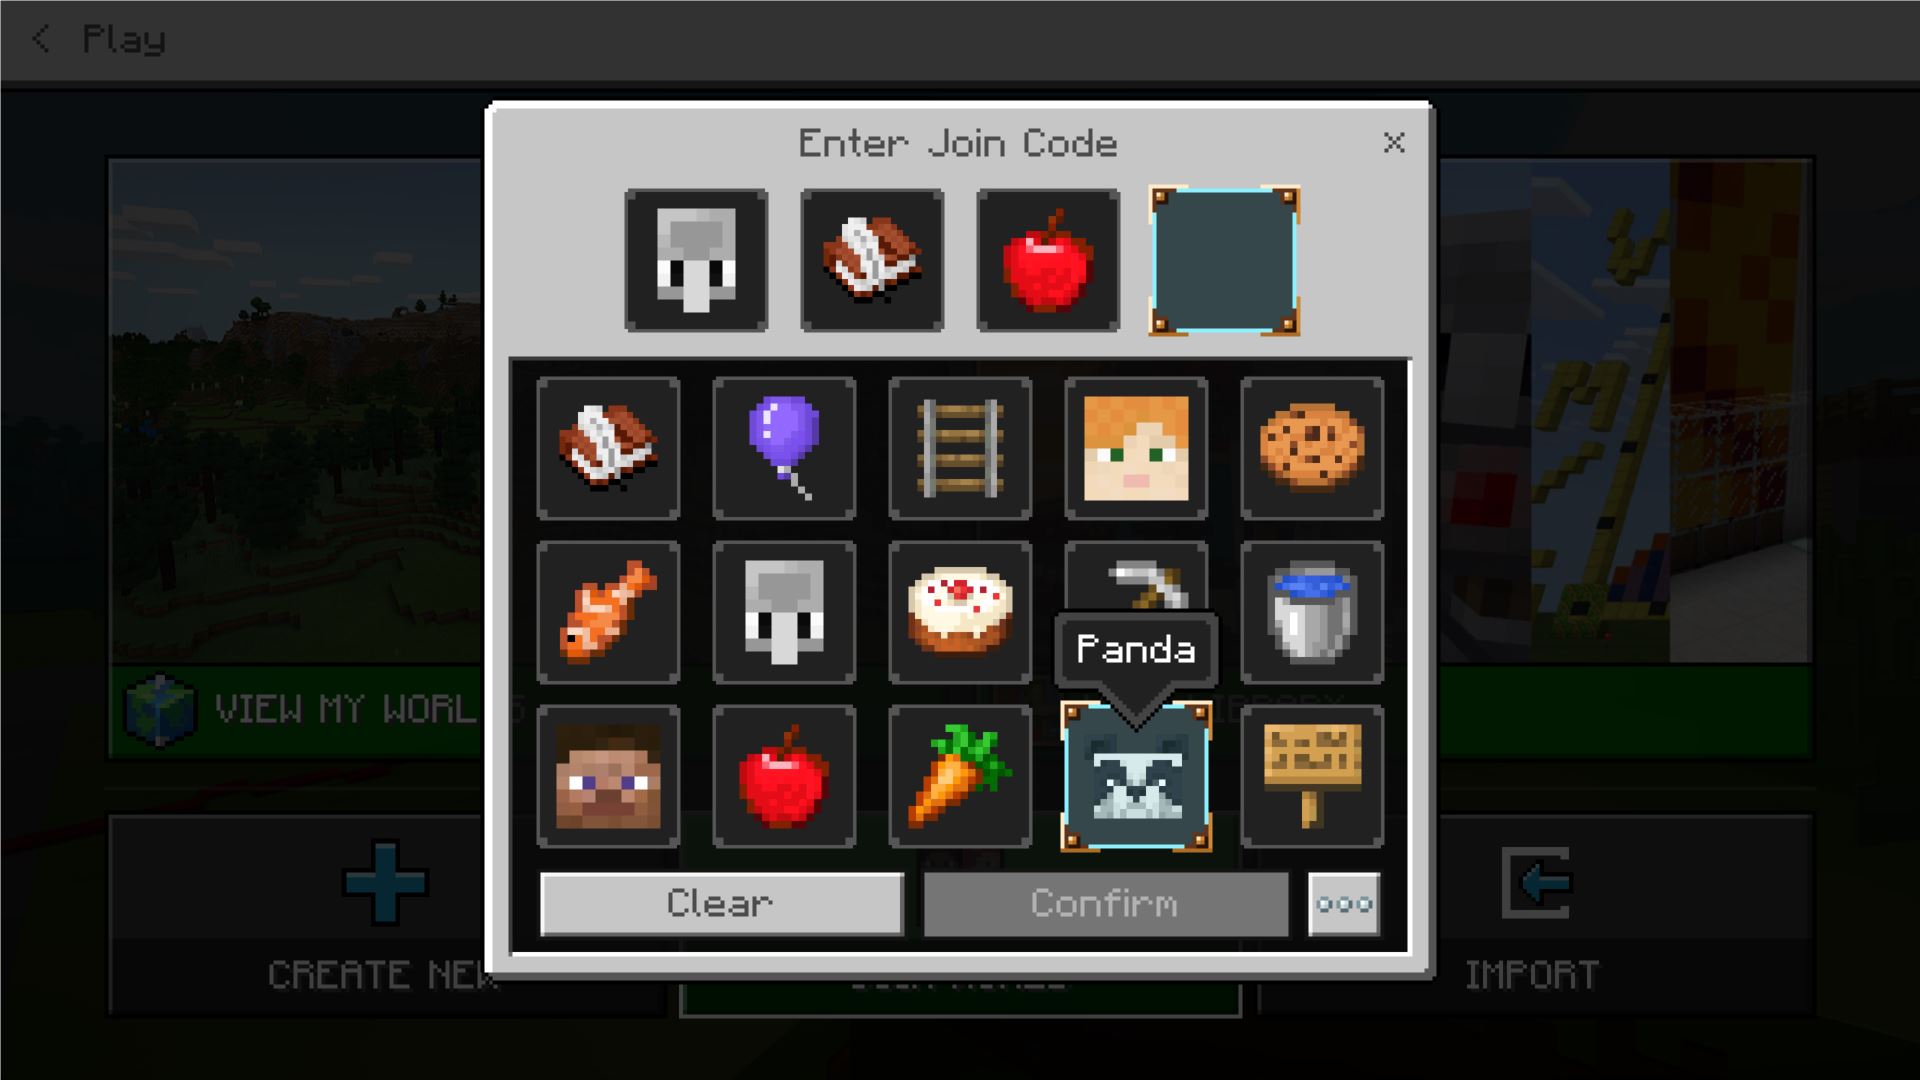
How to join a world
Click Play on the Home screen and then click Join World.

Enter the Join Code for the world you want to join by clicking on each picture in order.
If a student enters incorrect join codes repeatedly, they'll get a warning after 3 failed attempts. After 5 failed attempts, they will be required to wait a few minutes before they can enter another Join Code. This prevents students from guessing Join Codes and entering sessions they are not invited to.
Configure settings for your multiplayer game
World Settings
Pause the game, and then click Settings on the World Settings tab.
Select the default permissions you would like players to have when they join your world: Visitor, Member or Operator. Note that any Instructor who joins a world will always have Operator permissions. You can also configure other World settings from this screen.
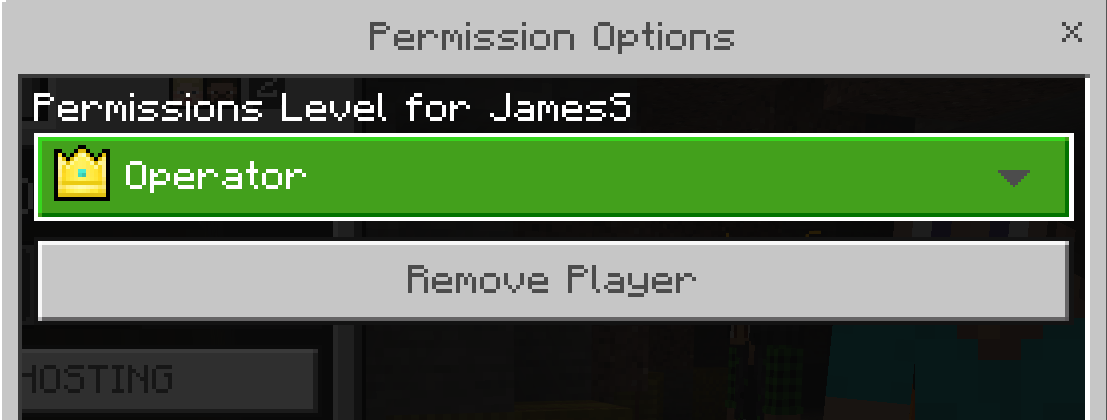
Player Permissions
Hosts and teachers are able to edit the permission levels and remove other players from the world
Host Settings
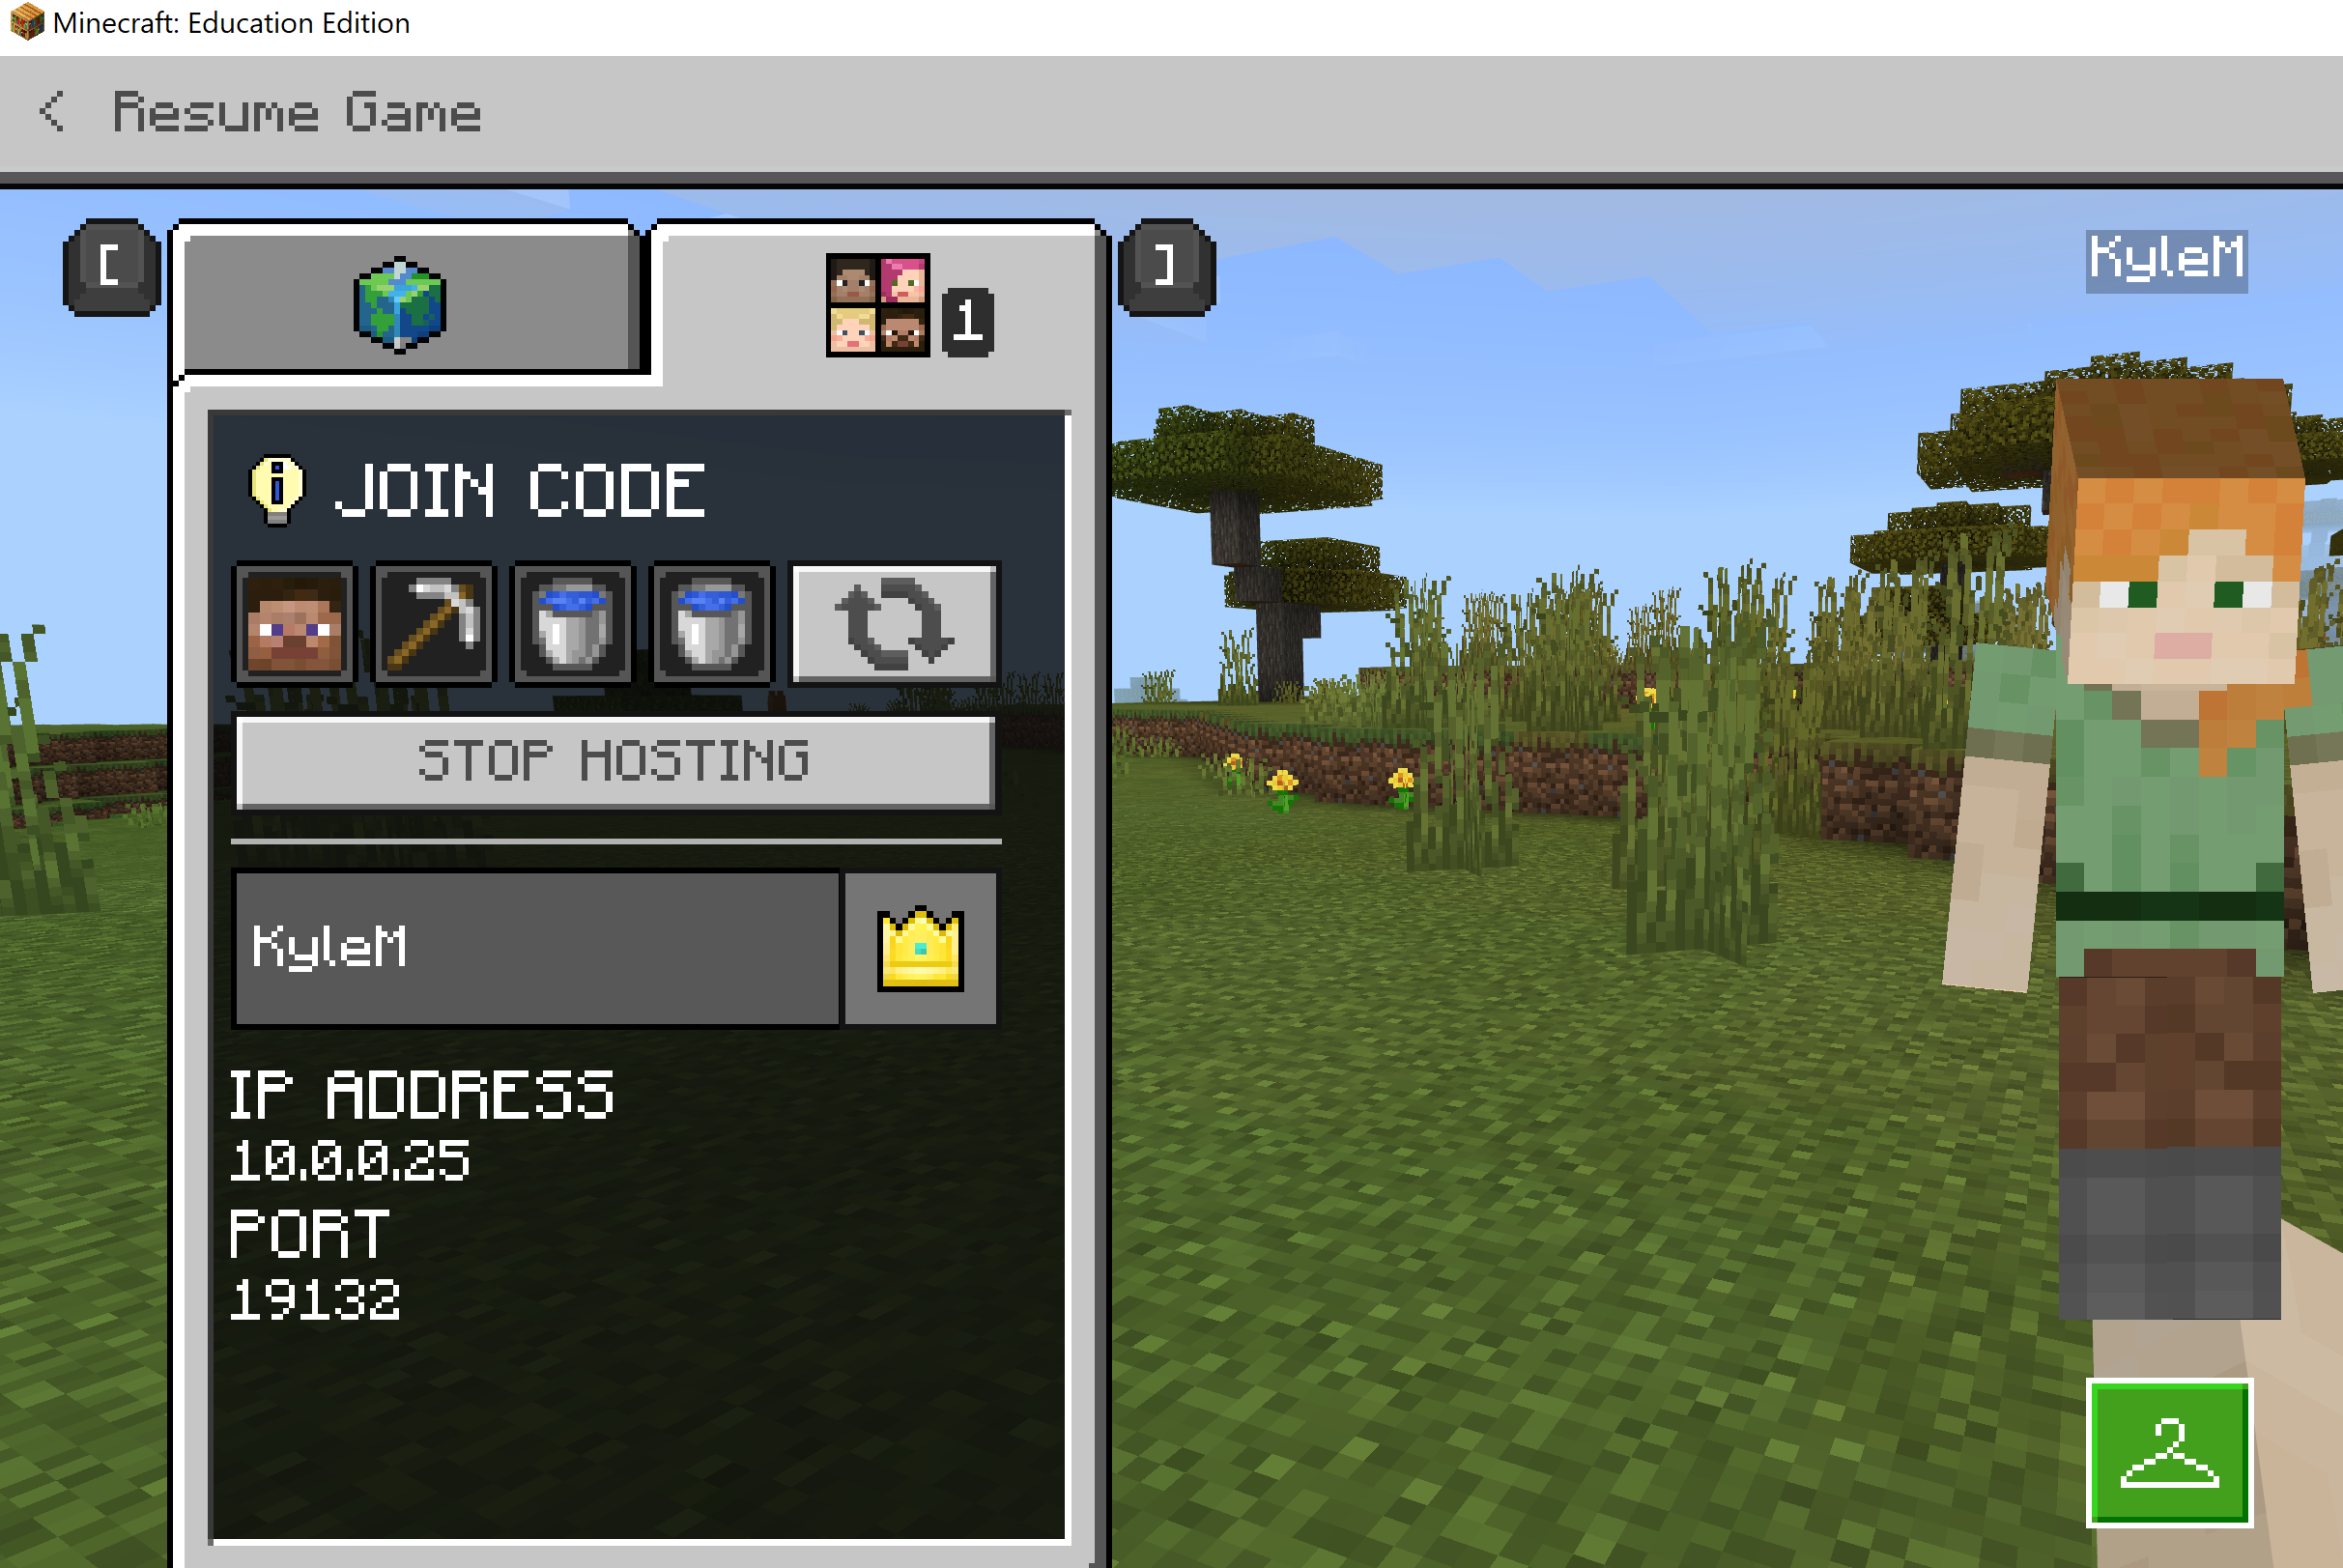
Pause your game and click the Friends tab. Take note of the four pictures in your Join Code and share them with players that you want invite into your world.
Restricting access to your world
At some point you may want to limit other players from joining your world. This can be done in a few ways:
- Change the Join Code by pausing the game and selecting the refresh symbol next to the Join Code. Players in the world will not have to re-enter their Join Code, however any new players must use the new Join Code.
- Use the command /setmaxplayers to limit the amount of people in your world
A teacher or host of a world will always be able to edit their own permissions as well as permissions for other players in the world.
Server Hosting
When using Minecraft: Education Edition, the host must be playing the game in order for others to join. If the hosting player leaves the world, all other players will be removed from the world. This is a different model from Java and Bedrock hosted servers, where you can create always-on multiplayer worlds using custom servers.
Can I setup a dedicated server for multiplayer in Minecraft: Education Edition?
Minecraft: Education is not currently compatible with server software, so it's not possible to set up an always-on world that players can visit anytime. This is a popular piece of feedback and we hope to have a solution in the future.
Can I use my Minecraft: Education Edition licenses to access a Minecraft Bedrock or Java server?
Since each of these Minecraft editions use distinct licensing systems, it's not possible to login to a different edition with Minecraft: Education Edition licenses.
Troubleshooting
Performance Issues
If you are able to connect to a multiplayer game but start to see decreased performance as more players join your game, try the following to improve your experience:
- It is recommended that the host computer has at least 1.5 Mbps of bandwidth.
- Examine your network speed and ensure the amount of players is not overloading your network.
- Turn down the render speed to 4 chunks and turn off fancy graphics in the Video area of the World Settings screen.
- For more information on how to best utilize multiplayer with 30 or more students you can connect with other teachers in our community forums.
Connection Issues
- Close out of the game and restart the application. Have joining/hosting a world be the first thing you do after launch and login. Once users have played their own world they must restart to join a multiplayer world
- Try joining the world manually with the IP address. Directions can be found in How to set up a Multiplayer game at home
- Try a new world. NOT one that has been previously saved
- Your network needs to allow communications with https://meeservices.azurewebsites.net/ (the URL needs to be "white listed" by any systems in your network that block access to the internet such as router settings, anti-virus or your firewall software)
- If you are on iPad:
- On your iOS device's home screen (iOS 14 or later), tap Settings.
- Tap Privacy. Local network. You'll find a list of apps.
- Turn on local network access for the app(s) that you would like to allow network access.
- Often times an antivirus software or your firewall can block multiplayer connection. This external article can provide guidance on ensuring your antivirus or firewall is not blocking the multiplayer connection: https://jackboxgames.happyfox.com/kb/article/28-how-to-whitelist-and-resolve-issues-in-antivirus-software-and-firewalls/
- If players are not using the same version of Minecraft: Education edition they will see the error "Could not connect. Outdated server". Use our download page to update to the latest version.
- If the host computer disconnects (even temporarily) everyone on the world will lose connection. The host will need to re-start the hosting session and all players will need to re-connect with the new join code.
- Try connecting your modem directly to your computer using a network cable.
- Try turning off other apps on your machine.
- Try removing and re-installing Minecraft: Education Edition.
- Make sure that port 19132 is not blocked in your network configuration.
- You also may need to forward port 19132 on your router. Forwarding ports is useful because it can help to make your network connection more stable and sometimes even faster.
- Forward Port 19132 TCP AND UDP.
- Visit the How to Set up a Multiplayer Game At Home article for guidance on forwarding Port 19132